Among the most important things to master for a mobile application developer is network programming. Every mobile application I have developed has involved some kind of network communication. During the year I have learned a thing or two. Read on to get some tips & trick from me.
Quite often the server is developed alongside the client. This means that you as a client developer have to wait for those awfully slow server programmers. Not every server programmer is slow, but most likely you have to wait for some server functionality. In situations like these, it is handy to roll your own server. But as a client developer, you do not want to spend an massive amount of time to setup a server. In fact, if it takes longer than a couple of minutes most client developers give up. What you need is a server that is very quick and easy to setup. Also it needs to be simple, yet powerful. Many server programmers would recommend you setting up a Tomcat server. The advantage of using a Tomcat server is that it is very versatile. But I do not really like Tomcat. It is to advanced for me. Another solution is to use a Jetty server. This is simpler to setup than Tomcat, but yet rather powerful. It could be executed from Maven. As such is is convenient to use for automated tests. Maven takes cares most of the work, including starting and stopping your Jetty server. But there is a new and rising star, the Sinatra server. The Sinatra server is actually a Ruby library. You use Ruby to program the behavior of your server.
A simple “Hello World” implementation for Sinatra looks like the one below (from the Sinatra Book).
require 'rubygems'
require 'sinatra'
get '/' do
"Hello world, it's #{Time.now} at the server!"
end
The file is saved as a file with .rb extension, in our example we save it as “hello.rb”. Then you start your server as simple as this:
ruby hello.rb
You get a nice line saying that Sinatra has taken the stage and that your server uses port 4567. This could of course be changed, if you want to mimic another server without changing your code. It is very easy to extend your server functionality. Ruby is easy to learn and powerful for making your own server without any big hazzle. Take a look at the “Sinatra Book” if you want to master Sinatra.
Another common scenario is that you need to figure out what happens when you make a certain URL request, for example if you do a REST request. Before even writing a single of code, you could use the cURL command line tool. Its available on most platforms, like Unix, Linux, Mac OS, Windows etc. For a matter of discussion, let us assume that you want to check that you programmed your Sinatra web server correctly. Then you the following command:
curl http://127.0.0.1:4567/
The response should look like this:
Hello world, it's Mon Oct 25 20:44:19 +0200 2010 at the server!
So now you know how to implement your own simple server, as well as how to debug your server request using curl. But wait, there is even more tricks I want to share with you. I hope that you feel like reading a little bit more.
I think that XML is a rather misused technologies around. It is used for many things, ranging from describing your builds (Ant, Maven, etc) to describing serialized objects traveling through cyberspace (SOAP, REST etc). When SOAP was introduced, one main argument for XML is that it human readable. What? Have you ever seen a SOAP request that is human readable? If you are about to send and/or receive objects there are much more suitable technologies than XML. Especially when making a mobile client, where XML parsing could take to much time and memory, it is important to understand that there are good alternatives. One good old technology is ASN.1, that is hugely underestimated. It was designed for communicating data between different architectures and CPUs. It is fast even on a 8-bit CPU. The biggest drawback is that it is not widely supported and it requires an ASN.1 compiler. However you could implement your own ASN.1 encoder/decoder quite easy. Another solution that is easier to use, but building on the same principles as ASN.1 is the Hessian protocol. It is a binary web service protocol. The specification is originally designed by Caucho, who did the Resin web server. The specification is open and implemented in many languages, including .NET, Flash, Ruby, Python, Objective-C etc. I have primarily used it for Java ME, where only a subset is implemented. If you use it in Java ME, I would recommend considering using it to store object data in the record store. But now it is more relevant for me to use it on Android or iPhone. The Objective-C variant for iPhone is called HessianKit. It is open source and released under Apache 2.0 license. Thus it is not a viral open source license, which I think is great. I will not describe how to use it, since there already is a good article on the subject “HessianKit Released”. I hope that you will consider using Hessian if you are in the position to decide what web service protocol to use. If you feel the urge to use XML for your web services, you could use Burlap which is the XML version of Hessian. The communication is as simple as it could get using XML.
Another useful tool is a network analyzer. This is good for finding out what happens between the client and server. For example, if you want to take a look at the headers are many times auto generated. I have used Wireshark with great success. It would not say it is easy to use, but when you need to use it is priceless.
These are the tools that I think I use the most for network programming. What are your best tools when doing network programming?

Showing posts with label Tips and Tricks. Show all posts
Showing posts with label Tips and Tricks. Show all posts
Oct 25, 2010
Oct 8, 2010
Synchronizing iPhone 4 with Google without iTunes
Today I received a brand new iPhone 4. Life was joyful. However it gave me some frustrating moments before I could use it for real. Here is the true story what happened when I got my iPhone 4.
I had prepared the migration by backing up my contacts from my HTC Hero. The HTC had no way to export contacts to a SIM card, but only to SD card. Strangely enough it was possible to import contacts from a SIM card. Anyway I did not consider this to be a big problem, since exporting to the SD card should work fine.The contacts was saved as a VCF file. This was easily imported by double-clicking on the file. When this was done, all the google contacts was on my Mac Book. After I started and initialized the iPhone, it was connected via a USB cable to the Mac Book. Consequently iTunes was started with a wizard. One of the steps was the sync setup. By default all contacts was to be synced. Perfect! This was exactly what I wanted. A couple of more steps and I pressed the “Sync”-button.
After a short while something really odd happened. A warning message saying that no synchronization of contacts was not possible, since the phone was not connected. What! The phone was connected. Not good! I discovered a button labeled “Restore”. The help text explained that this should be used when in trouble. I felt like being in trouble and hit the restore button. The process was really fast, but enough time to get some tea. Then the same procedure once more. Still the same problem. Next try; search the Internet. I found out that I was not alone with this problem. I tried out all of the different solutions explained in the forum. Do not know how many times I cleared the sync settings, restarted the phone, re-booted the computer and all other kinds of tricks. The Apple support pages did not contain any other suggestions than found in the forum. Now I was really frustrated. I should not be that complicated to get your contacts into your new phone. Time to get a break. Get your brain to think in a different way. Reset the brain. Get some food.
Several hours later it was time to try a new approach. I googled “Sync iPhone Google”. I found an article called “Google Sync: Set Up Your Apple Device for Google Sync“. It seemed to be exactly what I was looking for. The article explained how to use add an account in the iPhone to synchronize mail, contacts and calendar. In fact it was a Microsoft Exchange account. It took me less than 5 minutes to have mail, contacts and the calendar in sync.
The final solution was much simpler than copying contacts via the computer. The intent was to only transfer the contacts and then set up a mail account on the phone. Now I get an all-in-one solution, with mail, contacts and calendar synchronization. Now my life is joyful again.
Apr 21, 2010
Printing Stuff from an Android Phone with PrinterShare
I am always on the quest to find nice applications for my Android. There are many not so good applications on Android Market. Many applications are fun for a couple of minutes, but not so useful. Today I found one that I liked. I do not know if I am going to use it a lot, but the concept is simple and yet powerful. I am talking about the PrinterShare application.
The PrinterShare application is used for printing from your Android application. You could print pictures, web pages, contacts, messages, e-mail etc. The PrinterShare is also added to the share menu. You have two ways of printing your stuff; either using a nearby printer or a remote printer. A nearby printer is found using a Wifi access point. To use a remote printer you need to install an application on your computer and register yourself at the PrinterShare site. Let us see when I tried out the PrinterShare application.
Finding a nearby printer was very easy. My printer is connected to my Synology DS110j, which has support for the Bonjour protocol. Since the PrinterShare application also has support for Bonjour they found each other without any problems. But I was a little bit disappointed when I only could print a test page. To print using a nearby printer you need to buy the pro version of the PrinterShare application. The real bad thing here is that paid applications are not available here in Sweden. But luckily enough it seems to be possible to buy a key using PayPal. The price is a modest $4.95.

Since I was curious to try the application out, I registered myself at the site. The registration was simple. I entered my e-mail address, in return I got an e-mail with an auto generated user id and password. A couple of minutes later I had managed to print a picture that I found in my phone. Nice and easy.
Beside the setback with using the local printer solution, I was impressed how simple it was to get everything to work. It is applications like this that is nice to have installed on your Android phone. I am not sure if this is an application that I am going to use very often, but it is rather cool. If I am going to use it extensively, I think it would be worth paying $4.95.
What is your favorite Android application? Is there any Android application that you could not live without?
The PrinterShare application is used for printing from your Android application. You could print pictures, web pages, contacts, messages, e-mail etc. The PrinterShare is also added to the share menu. You have two ways of printing your stuff; either using a nearby printer or a remote printer. A nearby printer is found using a Wifi access point. To use a remote printer you need to install an application on your computer and register yourself at the PrinterShare site. Let us see when I tried out the PrinterShare application.
Finding a nearby printer was very easy. My printer is connected to my Synology DS110j, which has support for the Bonjour protocol. Since the PrinterShare application also has support for Bonjour they found each other without any problems. But I was a little bit disappointed when I only could print a test page. To print using a nearby printer you need to buy the pro version of the PrinterShare application. The real bad thing here is that paid applications are not available here in Sweden. But luckily enough it seems to be possible to buy a key using PayPal. The price is a modest $4.95.

Finding my nearby printer.
Since I was curious to try the application out, I registered myself at the site. The registration was simple. I entered my e-mail address, in return I got an e-mail with an auto generated user id and password. A couple of minutes later I had managed to print a picture that I found in my phone. Nice and easy.
Beside the setback with using the local printer solution, I was impressed how simple it was to get everything to work. It is applications like this that is nice to have installed on your Android phone. I am not sure if this is an application that I am going to use very often, but it is rather cool. If I am going to use it extensively, I think it would be worth paying $4.95.
What is your favorite Android application? Is there any Android application that you could not live without?
Apr 5, 2010
Back at Home :)
I am finally back from my vacation. Last week I was in Egypt with my family. They had an Internet café in the reception of the hotel, but it did only work one time when I was there. But I guess it was a good thing to be offline for some time. At least my family appreciated it. Prior to that I was in Istanbul. Turkey. This was a trip together with my colleges. I learned a lot of new things about the Android platform. The most interesting thing was to try out Robotium, a testing framework for Android. It is built around the existing testing framework found in Android, but it is much simpler. If you want to know more, please read this excellent article.
That is all for now. Nice to be back at home with a working Internet connection.
That is all for now. Nice to be back at home with a working Internet connection.
Mar 31, 2010
Using Amazon S3 to Backup a Synology DS110j
One of the most important features of the Synology DS110j NAS is the ability to let it backup itself. This is actually a new feature in V2.3 of the DiskStation firmware. Here are my first impressions.
There is one thing that bothers me; I could not re-use the old bucket which I created when using Jungle Disk, at least what I could tell. When selecting the existing bucket, the DiskStation does not accept it because of its long name. The Jungle disk also create strange directory layout with something that looks like a tree map. This is in normal cases hidden for the user; Jungle fixes to mount a network drive. The network drive looks like a normal directory. If I remember correctly this is something that I choose when creating the original bucket. Anyway I tested and created a new bucket. I then started a backup of a small amount of files to test how it worked. The DiskStation solution is much simpler than Jungle Disk. One must consider that the Amazon backup is a new feature of the DiskStation software, while Jungle Disk has been around for some time. For example, you could not encrypt the content. You only use an encrypted transfer, that is you are using HTTPS for transfer. Another thing that I miss is a progress bar or similar. As it is today, you only see the status like this:

You only see that the backup is going on. I think I need to file a feature request for this. Notice that the backup type is a little bit misleading. As I wrote earlier, it is only the transfer that is encrypted.
The Jungle Disk desktop software discovered the new bucket I created for the DiskStation server. It informed that the bucket was compatible with Jungle Disk. I was then a little bit surprised when I could not discover any contents there. I decided to get another Amazon S3 browser. I found the CyberDuck browser. It has the capability to browse an Amazon S3 account, as well as a multitude of other servers like FTP, Samba etc. The FTP browser could come in handy when connecting to the FTP server in the DiskStation. (I have actually tested it and it worked without any problems.)
The CyberDuck browser works like a charm with all my buckets, see the picture below.

This shows the directory layout for the DiskStation and the Jungle Disk buckets. Notice that I have decided to do no incremental backup for the DiskStation. This is because I want to be able to restore my data, even if my DiskStation crashes. I could for example use CyberDuck to download all the contents. I think that I have configured the Jungle Disk to do incremental backup, which is like comparing apples and oranges. Anyway I am a little bit wiser than I was when I configured Jungle Disk from the beginning. The drawback is of course that is uses a lot of more space on the server. My opinion is that it is worth the extra money to be on the safe side. It is going to take some days to backup the pictures once more, but the DiskStation could work 24/7 without affecting my daily work. Meantime I could test other DiskStation features. There seems not to be any performance problems using other services while doing the backup. But this is only a problem during the first backup. When the initial backup has been performed, I have scheduled the backup to run at night every.
All in all I think that this solution is much better than the old one. All of our media files are now stored on the DiskStation and the backup is done as described. On my Mac I run TimeMachine to backup my laptop automatically. I will be able to go to sleep each night being sure that the things that I have added are safely transferred to my Amazon S3 account.
Mar 26, 2010
Configuring and Installing my Synology DS110j NAS
It is now time to configure and install my brand new Synology DS110j NAS. It comes with a CD containing V2.2 of the firmware and the desktop application. However I want to use V2.3, since it has support for backing up to a remote Amazon S3 account. I had downloaded and installed V2.3 of the desktop application. The desktop applications are the Synology Assistant and DownloadRedirector. The Assistant is used to find all the Synology servers on your network. When it does, you could use it to configure it and do basic setup. It also contains a resource monitor and a photo uploader. The DownloadRedirector is used for setting up downloads that downloads files directly to the DiskStation. Thus it is time to start the Synology Assistant.
When starting the Assistant you see a list of servers. In my case there was only one. The status of it was "not configured". By double clicking on it, I started a configuration wizard. I used the standard settings on every page. However at the last page I was given the choice to select which firmware version. Good! I selected the downloaded zip file. It complained that it was not the correct file extension. It should a .pat file, that is a firmware patch file. OK, I double clicked on the zip file to extract it. No .pat file inside it. I downloaded another version to figure out if it contained a .pat file. But no success. I decided to go with the supplied version while I was to figure out what the problem was. Some people have complained about the long configuration time, especially the formatting have been causing problems for a lot of people. When I started the configuration I was told it could take about 10 minutes. It looked like this:

Meanwhile I was trying to figure out what the problem with my downloaded firmware was. Could not figure it out. Time to test the support. I filled in a rather basic issue report on-line. After that I continued to find the problem. Unzipped the original zip file once more. What? I saw the status information flashing by "Unzipping .pat file" or something. Does it really contain a .pat file? Strange! Is it a hidden file. No, it would not be possible to select the file by default then. Maybe it was the archive utility that is causing me all the trouble? I decided to use the command line zip. An there it was. The zip contained a .pat file. However the .pat file seems to be a zipped file as well. When it is discovered by the archive utility, it unzips this as well. In normal cases this is a good thing. If you extract a .tar.gz file, this is what you want.
For those of you that encounter the same problem, let me explain in more detail. You start the Terminal. You find it in the Utilities folder in the Application folder. The type the following (assuming that you downloaded it to the Downloads folder)
As a result you have a file called synology_88f6281_110j_1141.pat in your Downloads folder. Very easy if you know how to do it.
Now let me continue with the story. The next thing I decided to do was to setup the printer. The printer has always been connected to my wife's computer. The reason for this is that she simply print more documents than me and my laptop is not always at home. However I find it annoying to start her computer to print a single document. This day I for once really needed to print a document.
When the device was configured, I connected to it. This was done by double clicking it or select it and select connect. A web page was prompting me to login.

After login I found the "USB Printer" in the folder "External Devices". I plugged in the printer and it was automatically discovered. This is how it looked like:

I Googled the Internet and found the same description on the Synology wiki. However it contained more information for newer Mac OS versions. I started the configuration, but halted when I was prompted to enter an IP address. Not good! I should enter a name and the IP should be resolved automatically. After a little bit of research I found something called Bonjour. It is a service discovery protocol. Actually it is Apple's implementation of Zeroconf. I found the configuration for this in Home->File Sharing->Win/Mac OS. I enabled the Bonjour broadcast as seen here below.

From now on it was simple. Just opened the "System Preferences", clicked the "Print & Fax" button. Pressed the + button below the printer list. The printer was automatically discovered. Very easy setup.
This is all for now. Look out for my adventures with my DiskStation.
When starting the Assistant you see a list of servers. In my case there was only one. The status of it was "not configured". By double clicking on it, I started a configuration wizard. I used the standard settings on every page. However at the last page I was given the choice to select which firmware version. Good! I selected the downloaded zip file. It complained that it was not the correct file extension. It should a .pat file, that is a firmware patch file. OK, I double clicked on the zip file to extract it. No .pat file inside it. I downloaded another version to figure out if it contained a .pat file. But no success. I decided to go with the supplied version while I was to figure out what the problem was. Some people have complained about the long configuration time, especially the formatting have been causing problems for a lot of people. When I started the configuration I was told it could take about 10 minutes. It looked like this:

Meanwhile I was trying to figure out what the problem with my downloaded firmware was. Could not figure it out. Time to test the support. I filled in a rather basic issue report on-line. After that I continued to find the problem. Unzipped the original zip file once more. What? I saw the status information flashing by "Unzipping .pat file" or something. Does it really contain a .pat file? Strange! Is it a hidden file. No, it would not be possible to select the file by default then. Maybe it was the archive utility that is causing me all the trouble? I decided to use the command line zip. An there it was. The zip contained a .pat file. However the .pat file seems to be a zipped file as well. When it is discovered by the archive utility, it unzips this as well. In normal cases this is a good thing. If you extract a .tar.gz file, this is what you want.
For those of you that encounter the same problem, let me explain in more detail. You start the Terminal. You find it in the Utilities folder in the Application folder. The type the following (assuming that you downloaded it to the Downloads folder)
cd Downloads


unzip synology_88f6281_110j_1141.zip
As a result you have a file called synology_88f6281_110j_1141.pat in your Downloads folder. Very easy if you know how to do it.
Now let me continue with the story. The next thing I decided to do was to setup the printer. The printer has always been connected to my wife's computer. The reason for this is that she simply print more documents than me and my laptop is not always at home. However I find it annoying to start her computer to print a single document. This day I for once really needed to print a document.
When the device was configured, I connected to it. This was done by double clicking it or select it and select connect. A web page was prompting me to login.

After login I found the "USB Printer" in the folder "External Devices". I plugged in the printer and it was automatically discovered. This is how it looked like:

I Googled the Internet and found the same description on the Synology wiki. However it contained more information for newer Mac OS versions. I started the configuration, but halted when I was prompted to enter an IP address. Not good! I should enter a name and the IP should be resolved automatically. After a little bit of research I found something called Bonjour. It is a service discovery protocol. Actually it is Apple's implementation of Zeroconf. I found the configuration for this in Home->File Sharing->Win/Mac OS. I enabled the Bonjour broadcast as seen here below.

From now on it was simple. Just opened the "System Preferences", clicked the "Print & Fax" button. Pressed the + button below the printer list. The printer was automatically discovered. Very easy setup.
This is all for now. Look out for my adventures with my DiskStation.
Mar 22, 2010
Unboxing Synology DS110j NAS
Yesterday I came home from Istanbul, Turkey. My NAS that I ordered a couple of weeks arrived at the DHL pickup place the day I left for Turkey. As you might have guessed I have been eagerly awaiting to pick it up. Today I got some spare time to pick it up. I have always loved to unbox new technical stuff. This time I thought it was a good idea to do an unboxing article. Please enjoy!
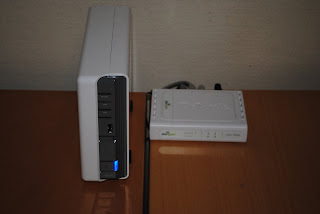
The first look at the stuff I received:

To the right you see the Synology DS110j NAS. There is no harddrive included, so you must install one yourself. To the left you see the harddrive that I ordered. It is a Western Digital Green 640 MB. All Synology products are energy conscious. Thus I hope that I get a solution the is environmental friendly and does not give me big electrical bills.

Here you see the label on the side listing the main features of the DS110j. The specifications are there as well. For more information please download this document.
 The box contains two smaller boxes and the power cord. The box to the left contains the NAS device and the box to the right some additional cables and the power supply. Let us take a look a closer look at the box to the left.

Now we are getting somewhere. The NAS is about the be unveiled. But there seems that I need to read something first. Synology have saved some trees by printing a very small booklet. It references to the documentation stored on the enclosed CD. So you need a computer to set things up, but that should be no surprise since it is intended to be used with your computer.
This is how the front looks like
 A fairly regular set of LEDs and buttons. From top to bottom, the LEDs are; STATUS, LAN, DISK. Below the DISK LED there is an unnamed LED. Maybe a LED showing the USB status. Me do not know. Then comes a USB connector. Here you could connect a harddrive or a printer. If you connect a harddrive or a memory stick here it is possible use the USBCopy functionality. By pressing the button below it, the content is copied to the diskstation. At the very bottom you find the On/Off button and the corresponding LED. This turns into blue when the device is on. It blinks when the device is starting up.
The back looks like this


The first look at the stuff I received:

To the right you see the Synology DS110j NAS. There is no harddrive included, so you must install one yourself. To the left you see the harddrive that I ordered. It is a Western Digital Green 640 MB. All Synology products are energy conscious. Thus I hope that I get a solution the is environmental friendly and does not give me big electrical bills.

Here you see the label on the side listing the main features of the DS110j. The specifications are there as well. For more information please download this document.


Now we are getting somewhere. The NAS is about the be unveiled. But there seems that I need to read something first. Synology have saved some trees by printing a very small booklet. It references to the documentation stored on the enclosed CD. So you need a computer to set things up, but that should be no surprise since it is intended to be used with your computer.
This is how the front looks like

The back looks like this

At the top you see the fan. Below it is two USB connections. These could be used the same way as the front connection. Next up is the Ethernet connection. There is also a reset button and a power connector. To the right you have a keylock hole.
Now it is time to take a look inside. Just put it on the table and push the lid forward. Very easy. I still remember those old PC cases where it very long time to get open the case.

To install the harddrive you just push the it into the slide. When it is in place, you use the screws that are included to fasten the harddrive.


On with the lid again. Two more screws to fasten the lid and the NAS is ready to use. Connect the power supply and the network cable to the switch. It only took me a couple of minutes to install the harddrive and connect the NAS. I think that even a non-technical person could fix this very fast.
Now everything is in place. The NAS is situated near the office switch. The switch is a D-link Green DGS-1005D, which also is environmental friendly. It switches of the power when a connection is idle for a long time and adjust itself to the length of the connected cables. The supplied network cable was to long, so I replaced it with the shorter one (0,5m).

Now it is ready to be used, nearly anyway. It needs to be configured. But that is another story. The unboxing took me less than 20 minutes, although I did it very slowly and spent some time taking photos. As mentioned it is easy to install your own harddrive and easy to get started. So far so good anyway.
Feb 21, 2010
Reading Properties Files on Android (Investigation for microlog4android)
Today I have investigated the possibilities to read properties files on Android. In microlog4android there is no configuration possibilities via file as it is today. The microlog4android development team feels that we need to re-write the configuration from scratch. There are many reasons for this decision, for example there is the Properties class available on Android while in Java ME we use microproperties. These are my findings about properties files on Android.
My first thought was to use the SharedPreferences class. My brain picked up this idea while using the SharedPreferences in another project. The SharedPreferences is used to read/write preferences for an Android application. The preferences are stored in an xml file that is put in the private directory structure of an application. You could edit the file by pulling it from the device or emulator using
But how do we do it in microlog? The properties are stored in a properties file that is put in the JAR or by setting properties in the JAD file. Both are easily edited in Eclipse without no need to pull/push the file. The same goes for NetBeans. The properties file is bundled with the jar. Why not do the same on Android? Time to Google again! I found out that there was primarily two ways of doing this:
The code is dead simple and thank God for the Properties class, although microproperties would do the trick. The second way to do it is as simple as the first approach. The code looks like this:
Notice that I omitted the code for getting the resources, since this was part of the first example. Both ways seems to be good. But what to choose? Using approach 1) has the following advantages from a microlog4android perspective:
My first thought was to use the SharedPreferences class. My brain picked up this idea while using the SharedPreferences in another project. The SharedPreferences is used to read/write preferences for an Android application. The preferences are stored in an xml file that is put in the private directory structure of an application. You could edit the file by pulling it from the device or emulator using
adb pull. After editing it you push it back using the adb push command. If you are using the Android Eclipse plugin you could use the file browser to do the same trick. But this is cumbersome to pull/edit/push the file and I do not really like to use XML for storing properties.But how do we do it in microlog? The properties are stored in a properties file that is put in the JAR or by setting properties in the JAD file. Both are easily edited in Eclipse without no need to pull/push the file. The same goes for NetBeans. The properties file is bundled with the jar. Why not do the same on Android? Time to Google again! I found out that there was primarily two ways of doing this:
- Using the AssetManager
- Reading a raw resource
/assets directory while the other was put in the /res/raw directory. The first thing that happened was that Eclipse complained about the naming of micrologV2.properties that was put in the /res/raw directory. It was kind enough to inform me that only [0..9][a..z] was allowed. Changing the capital V to a lower case v was simple. Now time to do some coding. The code for reading using the AssetManager looked like this:Resources resources = this.getResources();
AssetManager assetManager = resources.getAssets();
// Read from the /assets directory
try {
InputStream inputStream = assetManager.open("microlog.properties");
Properties properties = new Properties();
properties.load(inputStream);
System.out.println("The properties are now loaded");
System.out.println("properties: " + properties);
} catch (IOException e) {
System.err.println("Failed to open microlog property file");
e.printStackTrace();
}
The code is dead simple and thank God for the Properties class, although microproperties would do the trick. The second way to do it is as simple as the first approach. The code looks like this:
// Read from the /res/raw directory
try {
    InputStream rawResource = resources.openRawResource(R.raw.micrologv2);
    Properties properties = new Properties();
    properties.load(rawResource);
    System.out.println("The properties are now loaded");
    System.out.println("properties: " + properties);
} catch (NotFoundException e) {
    System.err.println("Did not find raw resource: "+e);
} catch (IOException e) {
    System.err.println("Failed to open microlog property file");
}
Notice that I omitted the code for getting the resources, since this was part of the first example. Both ways seems to be good. But what to choose? Using approach 1) has the following advantages from a microlog4android perspective:
- You are not limited to name your file with lower case letters only.
- It is possible to use a default file name if the user does not specify one.
Feb 13, 2010
Some Words about Microlog and Some Maven Stuff
As you faithful readers know, I am a believer in “Release early, release often”. Therefore I have tried to streamline the release procedure as much as possible. It must not feel like a burden to do a release. In fact it should be as fun as watching a comedy film, almost at least. But this time it was not very fun.
About two weeks ago, one of my fellow Microlog developers committed some changes. It was time to make a new release! I always start out with the deployment of Maven artifacts to the Sonatype repository. Ever since I changed from using the website at SourceForge as a repository, to the Sonatype repository this is a process that works like a charm. It usually takes a little more than two minutes to do this. After that point the artifacts are available on a Nexus staging repository. If something is wrong, you can drop the release. If the release seems to be ok, you have to close and promote the artifacts. When you close the staging release, a validation takes place. It checks if everything is ok.
The validation process has always worked for me since I first got it right. But not this time! It was complaining about missing information in all the module, information that is available in the parent module. As a coincidence, or not, a discussion about this was started on the Sonatype forums. As it turned out, this was a bug in a new validation scheme. There was a workaround, but I did not feel that it was worth it. From my experiences I could conclude that the folks at Sonatype usually fix this in a day or two. This time it took some days more.
When the validation bug was fixed it was time to give it a try again. This time the validation was complaining about a file not being signed (site.xml). A file that should not be signed, at least not according to me. This was part of the parent module. To get rid of this problem I decided to make a new sub-module for the site generation and try if I could sign the file this way. After a while I was able to sign the file. However now the site was not generated correctly. Not good! I moved the site.xml file back to the parent module, but kept the module since I thought the site generation was good anyway. The site generation worked again, but the file was not signed. Time to google. Now I found a solution that should work; disable the deployment of artifacts from the parent module. It worked, almost anyway. Now none of the artifacts was deployed. More googling. Aha, it is possible to disable the inheritance of some build plugins. Now it worked the way I wanted. Nice! The process of finding out how this should be done took me “only” about 4 hours. But there was one bonus; I could now disable artifacts modules that was not very useful to deploy. For those who wonders how to disable artifacts deployment, take a look at this helpful article.
Finally I managed to make the release and deploy the artifacts to the Sonatype repository. The artifacts are there in Maven central as well. For those of you who are interested, the version is now 2.3.5. Enjoy!
Oct 30, 2009
Powerful Logging in Java ME
The last couple of weeks has involved very much work. First of all I have been preparing the Microlog V2 release. Second I have been writing an introductory article to Microlog. It is now published over at Sun Developer Network. Please read the article and rate it.
http://java.sun.com/developer/technicalArticles/javame/javame-logging/
As always, feedback is very welcome. What do you think about the latest Microlog (V2) release? What do you think about the article?
http://java.sun.com/developer/technicalArticles/javame/javame-logging/
As always, feedback is very welcome. What do you think about the latest Microlog (V2) release? What do you think about the article?
Oct 15, 2009
Using Microlog from Maven
Microlog V2 is available from the Maven central repository, which was not the case for Microlog V1. Thus you need to add the Microlog Maven repository to your Maven project file when using Microlog V1. This is not the case with Microlog V2, since the Maven central repository is automatically searched if no repository is specified. Just add this simple snippet into your pom.xml file:
<dependency>
 <groupId>net.sf.microlog</groupId>
 <artifactId>microlog-logger-core</artifactId>
 <version>2.0.5</version>
 <scope>compile</scope>
</dependency>


This will let you use the core part of Microlog. If you wish to have access to the MIDP part of Microlog, add this snippet:


<dependency>
 <groupId>net.sf.microlog</groupId>
 <artifactId>microlog-logger-midp</artifactId>
 <version>2.0.5</version>
 <scope>compile</scope>
</dependency>


Notice that the version is 2.0.5 which is the latest stable release as of today. For those who want to be on the cutting edge, there is also a snapshot version available. Just replace 2.0.5 with 2.1.0-SNAPSHOT in the examples above.

And that is it! You could now compile your Java ME code that uses Microlog within a a couple of minutes. A lot of projects are using Maven and I hope that you will find this tip useful.
Sep 27, 2009
Microlog Re-started
Finally! I have now re-started my work with Microlog. The re-start took longer than expected; Maven was giving me a hard time. To start with it did not manage to create a jar archive, but a
I finally got around to make what I really wanted to do; implement something that I call aliases. Please let me explain what I mean. A lot of users has complained about being forced to know the name of the
With aliases it looks like this:
You could now use the appenders and formatters without knowing their full classname. This goes for all the built-in appenders and formatters. I think this feature is rather handy. What do you think?
NullPointerException. Since the compilation worked I find it strange that Maven did not manage to create a jar archive. Very strange! I use Maven 2.0.9 since some other project that I am involved in require that version. Anyway I decided to upgrade Maven to the latest stable version. Voila! Problem solved! Now another problem occurred; the pre-verification failed. Some libraries was included several time, which caused ProGuard to emit a lot of warnings. After a couple of minor changes the build managed to finish without any errors. All in all this took an hour or so. Time that I much rather spend on development, than on fixing Maven related problems.I finally got around to make what I really wanted to do; implement something that I call aliases. Please let me explain what I mean. A lot of users has complained about being forced to know the name of the
Appender and Formatter classes when creating their configuration files, aka properties files. The solution was quite simple. I put an alias in a Hashtable together with the real classname. Let us see how it looked like before my changes:
microlog.appender=net.sf.microlog.core.appender.ConsoleAppender;net.sf.microlog.midp.appender.RecordStoreAppender
microlog.appender.RecordStoreAppender.recordStoreName=MyRMSName
microlog.appender.RecordStoreAppender.maxLogEntries=40
microlog.formatter=net.sf.microlog.common.format.PatternFormatter
microlog.formatter.PatternFormatter.pattern=%c [%P] %m %T
With aliases it looks like this:
microlog.appender=ConsoleAppender;RecordStoreAppender
microlog.appender.RecordStoreAppender.recordStoreName=MyRMSName
microlog.appender.RecordStoreAppender.maxLogEntries=40
microlog.formatter=PatternFormatter
microlog.formatter.PatternFormatter.pattern=%c [%P] %m %T
You could now use the appenders and formatters without knowing their full classname. This goes for all the built-in appenders and formatters. I think this feature is rather handy. What do you think?
Aug 25, 2009
Appending to a File in Java ME ( J2ME )
Yesterday I was asked how to append to a file in Java ME. I have never done this before, so I could not give an answer. After some research we found a working solution. This article will go through the different ways to solve it.
I first looked into the JSR-75 documentation, but I did not find any solution there. When searching the Internet, the first solution I found was this:
The next solution I found looked like this:
This works but is rather clumsy and does not look clean. Note that you need to call
The method openOutputStream(long bytesOffset) open an OutputStream and moves the position the specified offset. When the offset is greater than the file size, the position is moved to the end of the file. This is an clean and portable solution.
I first looked into the JSR-75 documentation, but I did not find any solution there. When searching the Internet, the first solution I found was this:
At first it looks promising. The
public void appendToFile() {
try {
 FileConnection fileConnection = (FileConnection) Connector.open(
         "file:///c:/other/textfile.txt;append=true",
         Connector.WRITE);
 OutputStream outputStream = fileConnection.openOutputStream();
 PrintStream printStream = new PrintStream(outputStream);
 printStream.println("Some text to append");
} catch (IOException e) {
 e.printStackTrace();
}
}
Connector class specifies that you could add parameters when opening a connection. However the parameters for JSR-75 are not standardized. This solution was mentioned in the Nokia developer forums, so I guess that it works on Nokia phone. The platform that we uses did not support it. Thus this solution is not portable across different Java ME devices. I recommend that you DO NOT use a solution like this.The next solution I found looked like this:
public void appendToFileFileSize() {

try {
   FileConnection fileConnection = (FileConnection) Connector.open(
           "file:///c:/other/textfile.txt", Connector.WRITE);
   OutputStream outputStream = fileConnection.openOutputStream();
   outputStream.flush();
   long fileSize = fileConnection.fileSize();
   String textToAppend = "Some text to append";
   outputStream.write(textToAppend.getBytes(), (int)fileSize, textToAppend.length());
} catch (IOException e) {
   e.printStackTrace();
}
}
This works but is rather clumsy and does not look clean. Note that you need to call
flush() before you make a call to fileSize(), otherwise the size is not guaranteed to be correct. But wait, there is another solution.
public void appendToFileMaxLong(){
try {
 FileConnection fileConnection = (FileConnection) Connector.open(
   "file:///c:/other/textfile.txt", Connector.WRITE);
 OutputStream outputStream = fileConnection.openOutputStream(Long.MAX_VALUE);
 PrintStream printStream = new PrintStream(outputStream);
 printStream.println("Some text to append");
} catch (IOException e) {
 e.printStackTrace();
}
}
The method openOutputStream(long bytesOffset) open an OutputStream and moves the position the specified offset. When the offset is greater than the file size, the position is moved to the end of the file. This is an clean and portable solution.
Jul 22, 2009
My Top-10 Favorite Development Tools
The other day I got a question about which are my favorite tools, i.e. what is in my Java developer toolbox. I was asked to list my top-10 favorites. This gave me the inspiration to write a blog article on the subject. So here goes my top-10 list of favorite tools.
This it is. Do you think that I have missed some tool? Is something on the list that in your opinion that should not be there? Looking forward to her
- Eclipse
The basic tool in any Java developers toolbox. The IDE to use. - Beyond Compare
This is the best comparison tool that I have ever used. There are some open source comparison tools, but they do not match up against Beyond Compare. I think that Beyond Compare is worth every penny. - FindBugs
FindBugs is used for finding bugs or potential bugs in your Java code. I use the plug-in version in Eclipse and use it from Maven as well. - Microemulator
An Open Source Java ME emulator. Lets you test your Java ME applications. The drawback is that some JSRs are not implemented yet. Most notably is JSR-205 and JSR-211. - Virtual Box
This lets me run Ubuntu Linux inside Windows Vista. No more dual boot configurations. - Subclipse
Lets you use Subversion inside Eclipse. The Subversive plug-in is a better tool, but the Subclipse tool works better with the Maven plug-in- - Tortoise SVN
Whenver you are in the Windows file explorer it is nice to have access to Subversion. I have set it to use Beyond Compare when doing file comparison. - Maven
I did not really like Maven from the beginning. At the time I was a big fan of Ant. Maven contains some functionality that is not available in Ant, such site generation. I - Eclipse Maven plug-in
The name speaks for itself, it gives the ability to run Maven from Eclipse. There is also the pom and Doxia editors that are really good. - Eclipse MTJ plug-in
The Mobile Tools for Java lets you perform the necessary Java ME tasks.
This it is. Do you think that I have missed some tool? Is something on the list that in your opinion that should not be there? Looking forward to her
Jul 6, 2009
Using Your Own Stuff Is Good
Using your own stuff is good! Nothing remarkable about that, almost every developer would agree on that. In fact this is how Microlog once was created. It was created out of a real need and I used it extensively from the beginning. As years has gone by, a lot of contributions has been made. The philosophy behind Microlog is that there should many different logging destinations, each suitable in its on special situations. Which logging destination you choose is a matter of taste and the technical circumstances. As a consequence I tend to use a small portion of Microlog, beside the core classes.
The project I am currently involved in has been running for several months before I joined. The initial team has been wise enough to choose Microlog. When I joined the project, Microlog V1.1.1 was used. Yesterday I was given the assignment of logging some low level details, that potentially could create a lot of logging output. To be able to control the logging with fine granularity, I needed the newest and hottest version of Microlog. Its support for hierarchical loggers, makes it possible to set different logging levels on different classes. In my case I wanted to use TRACE for one class, but DEBUG for the rest of the classes. In my own projects, I usually only import the classes that I really need and leave the rest out. In some cases I have used the binary version of Microlog and ProGuard to keep the packaged Microlog classes to a minimum. The current project is different, Maven is used for building. As such it uses a repository for its jar files.
I added Maven code to use the latest version of Microlog snapshot. When I used it on my own computer this worked like a charm, but one of my colleagues complained that he could not perform a build. It was missing a jar file from the Microlog repository. As it turned out, this jar was missing. It was available for Microlog V1.1.1, but not for the latest snapshot build. It was very easy to solve, just copy a directory and the repository was working the way it should.
Other problems emerged when configuring Microlog. The original idea was that the new
PropertyConfigurator should be backward compatible, in order to make it easy to upgrade from Microlog 1.x.x to Microlog V2.0. I found one bug; a property name had changed. This was also easy to fix. Another deploy and the repository contained the fix. The other problem is that I have re-structured the packages, which means that all the appenders and formatters properties have changed. The re-structuring is very important, so I plan to keep the new package names. Although they break the backward compatibility. But since I have changed the major version number, I am not obliged to be 100% backward compatible. When writing this, a new idea has popped up in my head. Maybe I should implement a converter that converts from the old property format to the new property format. Is this a good idea? What do you think?
Jun 22, 2009
Using ProGuard to Shrink Microlog
There have been many users that are skeptical to use Microlog due to its size. The current snapshot is around 150 kb, while the latest final release is 127 kb. If you are doing a small MIDlet, this adds considerable overhead to your MIDlet. In normal cases you only use a fraction of all the classes. For example, you only use one or two appenders. The jar contains a lot of different appenders. But there is a solution. The solution is called ProGuard.
ProGuard is an application shrinker/optimizer/obfuscator for Java applications. It can be used from the command line or from your favorite IDE, such as Eclipse or NetBeans. ProGuard is an important tool in your MIDlet development toolbox.
The recipe for obfuscating your MIDlet and Microlog is as follows:
For those of you that are not using Eclipse, you could use the following configuration when running ProGuard from the command line.
Copy the content and save it to a file, for example proguard.conf. Then you start ProGuard like this:
By using ProGuard you reduce the size of your MIDlet jar. Unnecessary classes are removed, the code is optimized and obfuscated. And using Microlog does not mean lare overhead to your MIDlet. There are other alternatives to ProGuard, but ProGuard is the most widely and de-facot in the lovely world of Java ME.
ProGuard is an application shrinker/optimizer/obfuscator for Java applications. It can be used from the command line or from your favorite IDE, such as Eclipse or NetBeans. ProGuard is an important tool in your MIDlet development toolbox.
The recipe for obfuscating your MIDlet and Microlog is as follows:
- Select Window -> Preferences
- Select the Java ME -> Packaging -> Obfuscation
- Press the "Browse" button and select the directory where you installed ProGuard.

- Select Project -> Properties
- Set the dialog to the value according to this screenshot:

- Select "Java Build Path"
- Select the "Order & Export" tab. Check the Microlog jar like this

- Select your project. Bring up the context menu (in Windows it is done by a right click). Select "Mobile Tools for Java" -> "Create Obfuscated Package". You should now have an obfuscated jar in the /deployed directory. If you run the project as a "Emulated Java ME JAD", you automatically use the obfuscated jar file.


For those of you that are not using Eclipse, you could use the following configuration when running ProGuard from the command line.
-overloadaggressively
-defaultpackage ''
-allowaccessmodification
-dontusemixedcaseclassnames
-keep class net.sf.microlog.appender.MemoryBufferAppender
-keep class net.sf.microlog.appender.ConsoleAppender
-keep class net.sf.microlog.format.PatternFormatter
-injars microlog.jar
-injars yourmidlet.jar
Copy the content and save it to a file, for example proguard.conf. Then you start ProGuard like this:
java -jar proguard.jar @proguard.conf.By using ProGuard you reduce the size of your MIDlet jar. Unnecessary classes are removed, the code is optimized and obfuscated. And using Microlog does not mean lare overhead to your MIDlet. There are other alternatives to ProGuard, but ProGuard is the most widely and de-facot in the lovely world of Java ME.
May 7, 2009
Detecting Flight Mode (Kind of) in Java ME on a Nokia Mobile
The other day I wrote an article about how to detect flight mode. But it did not cover how to solve it on a Nokia phone. On a Nokia phone, like a Sony Ericsson phone, there is no system property to detect flight mode. On the other hand, if we asume that what we really are interested in checking if the network is available or not, we have a solution on a Nokia phone. If we check this, we can make the MIDlet smart, e.g. setting it in off-line or on-line mode.
The solution is very simple:
The trick here works on the Nokia S60 platform FP3, or later. I have not found out a solution on a Nokia S40 phone. Does anyone know?
The solution is very simple:
String networkAvailable = System.getProperty("com.nokia.mid.networkavailability");

if(networkAvailable.equals("available")){
   // Warn the user that the network is not available and off-line mode is used
}else{
   // Network available => we could work as normal.
}
The trick here works on the Nokia S60 platform FP3, or later. I have not found out a solution on a Nokia S40 phone. Does anyone know?
May 6, 2009
Detect Airplaine/Flight Mode on Motorola and Sony Ericsson Mobile Phones in Java
Many MIDlets communicate with a server and/or connects to the Internet. If the user enables airplane/flight mode, the MIDlet should be aware of this. This way it is possible to set the MIDlet in off-line mode automatically and inform the user when trying to access the net. It is much nicer to get a dialog saying "Sorry you are in flight mode, you cannot this and that", instead of "Failed to connect to server". This article describe how to do this in Java ME (on some platforms).
There is no API that enable a Java ME developer to access the flight mode. The key here is to get a system property via the right key, no pun intended :) This is done via a call to
On a Motorola mobile phone, with Motorola OS, this is done like this:
On a Sony Ericsson mobile phone it is a little bit different, since there is no system property to detect if we are in flight mode or not. The trick here is to use a key that detects the Radio Access Technology (RAT) used at the moment. This returns null if the radio is turned of, which it always is when in flight mode. The code looks like this:
And that is it! Pretty simple, but still powerful. I hope this trick is useful for you.
There is no API that enable a Java ME developer to access the flight mode. The key here is to get a system property via the right key, no pun intended :) This is done via a call to
System.getProperty("key"). The key differs from platform to platform.On a Motorola mobile phone, with Motorola OS, this is done like this:
String airplaneMode = System.getProperty("com.mot.network.airplanemode");

if(airplaneMode.equals("true")){
   // We are in flight mode
}else{
   // We are not in flight mode
}
On a Sony Ericsson mobile phone it is a little bit different, since there is no system property to detect if we are in flight mode or not. The trick here is to use a key that detects the Radio Access Technology (RAT) used at the moment. This returns null if the radio is turned of, which it always is when in flight mode. The code looks like this:
String flightMode = System.getProperty("com.sonyericsson.net.rat");

if(flightMode == null){
   // We are in flight mode
}else{
   // We are not in flight mode
}
And that is it! Pretty simple, but still powerful. I hope this trick is useful for you.
Apr 23, 2009
Setting the Locale in the WTK Emulator
Sometimes it is useful to how your MIDlet works with different locale settings. One solution is to install the MIDlet on a phone and change its locale. This should be easy to do on most phones. However it is useful to do this on the emulator as well. This article teach youo how to do it.
You have basically two ways to do this:
First you have to find the emulator.properties file. In Sun's Wireless Toolkit this is found in
Then you should search for this property:
In my installation it locked like this:
The code consists of two parts; the language code and the country code. These are separated by a dash ('-'). Notice that this is not as in Java SE, where it is separated by and underscore ('_'). The language codes are defined in ISO-639 and the country codes in ISO-3166. In my case I changed it to:
All you have to do now is to save the file and restart the emulator. Notice that this does not change the locale of the emulator, it only changes what is returned by
You have basically two ways to do this:
- Change the locale of your operating system
- Change the locale manually in your wireless toolkit.
First you have to find the emulator.properties file. In Sun's Wireless Toolkit this is found in
C:\WTK2.5.2\j2mewtk_template\wtklib and in Sony Ericsson SDK it is found in C:\SonyEricsson\JavaME_SDK_CLDC\WTK2\wtklib.Then you should search for this property:
microedition.localeIn my installation it locked like this:
microedition.locale: en-USThe code consists of two parts; the language code and the country code. These are separated by a dash ('-'). Notice that this is not as in Java SE, where it is separated by and underscore ('_'). The language codes are defined in ISO-639 and the country codes in ISO-3166. In my case I changed it to:
microedition.locale: sv-SEAll you have to do now is to save the file and restart the emulator. Notice that this does not change the locale of the emulator, it only changes what is returned by
System.getProperty("microedition.locale"); In my current project we use this to load the correct resources. Thus we need to test how the different strings are looking in different languages and screen resolutions.
Mar 10, 2009
How to do Logging
I tend to get into a lot of discussions about logging. It could have something to do with my Microlog development. Sometimes I find it hard to argue what is good practices when it comes to logging. So I searched the Internet and found these good articles on the subject:
I hope that you read them thoroughly, because the are definitely worth reading. But until then you are maybe interesting on my comments about them?
Starting with the first article, I must say that all of the tips are really good. From my point of view, the last rule "7. Do not log with
The second article is a little more general. The first advice is a little bit tricky; "No debugging logs in production". Microlog has no built-in feature to solve this, so I usually recommend to use the pre-processor found in MTJ. If you are running in other environments, like vi, you could use the ProGuard pre-processor. The second advice "Look through your logs" is easy to do with Microlog, if you log to a server. Microlog has the capability to log to several types of servers. The easiest would be to log to a syslog daemon or to Amazon S3. Most syslog daemons have some sort of filtering feature and export functions. This should make it easy for you to filter out the interesting stuff. The 3rd rule; "Never log locally" is as you now understand fairly easy with Microlog.
I hope that these articles will give you some good advice that you will be able to use.
I hope that you read them thoroughly, because the are definitely worth reading. But until then you are maybe interesting on my comments about them?
Starting with the first article, I must say that all of the tips are really good. From my point of view, the last rule "7. Do not log with
System.out or System.err" is especially important. The first sentence says it all "Always use a log framework, it can handle logging better than you." Of course I want you to use a logging framework. If you are working with Java ME or Android development, please try out Microlog!The second article is a little more general. The first advice is a little bit tricky; "No debugging logs in production". Microlog has no built-in feature to solve this, so I usually recommend to use the pre-processor found in MTJ. If you are running in other environments, like vi, you could use the ProGuard pre-processor. The second advice "Look through your logs" is easy to do with Microlog, if you log to a server. Microlog has the capability to log to several types of servers. The easiest would be to log to a syslog daemon or to Amazon S3. Most syslog daemons have some sort of filtering feature and export functions. This should make it easy for you to filter out the interesting stuff. The 3rd rule; "Never log locally" is as you now understand fairly easy with Microlog.
I hope that these articles will give you some good advice that you will be able to use.
Subscribe to:
Posts (Atom)