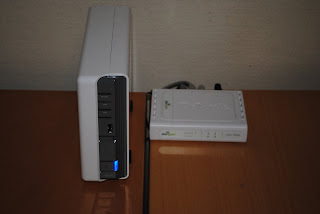
The first look at the stuff I received:
To the right you see the Synology DS110j NAS. There is no harddrive included, so you must install one yourself. To the left you see the harddrive that I ordered. It is a Western Digital Green 640 MB. All Synology products are energy conscious. Thus I hope that I get a solution the is environmental friendly and does not give me big electrical bills.
Here you see the label on the side listing the main features of the DS110j. The specifications are there as well. For more information please download this document.
The box contains two smaller boxes and the power cord. The box to the left contains the NAS device and the box to the right some additional cables and the power supply. Let us take a look a closer look at the box to the left.
Now we are getting somewhere. The NAS is about the be unveiled. But there seems that I need to read something first. Synology have saved some trees by printing a very small booklet. It references to the documentation stored on the enclosed CD. So you need a computer to set things up, but that should be no surprise since it is intended to be used with your computer.
This is how the front looks like
A fairly regular set of LEDs and buttons. From top to bottom, the LEDs are; STATUS, LAN, DISK. Below the DISK LED there is an unnamed LED. Maybe a LED showing the USB status. Me do not know. Then comes a USB connector. Here you could connect a harddrive or a printer. If you connect a harddrive or a memory stick here it is possible use the USBCopy functionality. By pressing the button below it, the content is copied to the diskstation. At the very bottom you find the On/Off button and the corresponding LED. This turns into blue when the device is on. It blinks when the device is starting up.
The back looks like this
At the top you see the fan. Below it is two USB connections. These could be used the same way as the front connection. Next up is the Ethernet connection. There is also a reset button and a power connector. To the right you have a keylock hole.
Now it is time to take a look inside. Just put it on the table and push the lid forward. Very easy. I still remember those old PC cases where it very long time to get open the case.
To install the harddrive you just push the it into the slide. When it is in place, you use the screws that are included to fasten the harddrive.
On with the lid again. Two more screws to fasten the lid and the NAS is ready to use. Connect the power supply and the network cable to the switch. It only took me a couple of minutes to install the harddrive and connect the NAS. I think that even a non-technical person could fix this very fast.
Now everything is in place. The NAS is situated near the office switch. The switch is a D-link Green DGS-1005D, which also is environmental friendly. It switches of the power when a connection is idle for a long time and adjust itself to the length of the connected cables. The supplied network cable was to long, so I replaced it with the shorter one (0,5m).

Now it is ready to be used, nearly anyway. It needs to be configured. But that is another story. The unboxing took me less than 20 minutes, although I did it very slowly and spent some time taking photos. As mentioned it is easy to install your own harddrive and easy to get started. So far so good anyway.


3 comments:
Thanks for sharing this article on Software development. It was very nice.
Looking for more..................Please continue.
Thank you for showing me what i will receive tomorow :)
I was hopping to see what comes next powering up.
Take a look at the following article about what happens next:
http://myossdevblog.blogspot.com/2010/03/configuring-and-installing-my-synology.html
Post a Comment